It’s been a busy week for the organizers of both the containers and kernel devrooms at FOSDEM 2024!
We received just under 100 submissions in total which had to be individually reviewed and voted on by our team of 8 volunteers. Then came the usual fun of checking that all speakers can still come to FOSDEM and finally finding room on the schedule for the selected talks!
This year, FOSDEM switched platform from the old and dated Pentabarf over to Pretalx, while we obviously hit a number of odd edge cases and issues, the overall experience was a massive improvement. Voting and scheduling could all be done intuitively directly in the platform instead of having to rely on data export and spreadsheets!
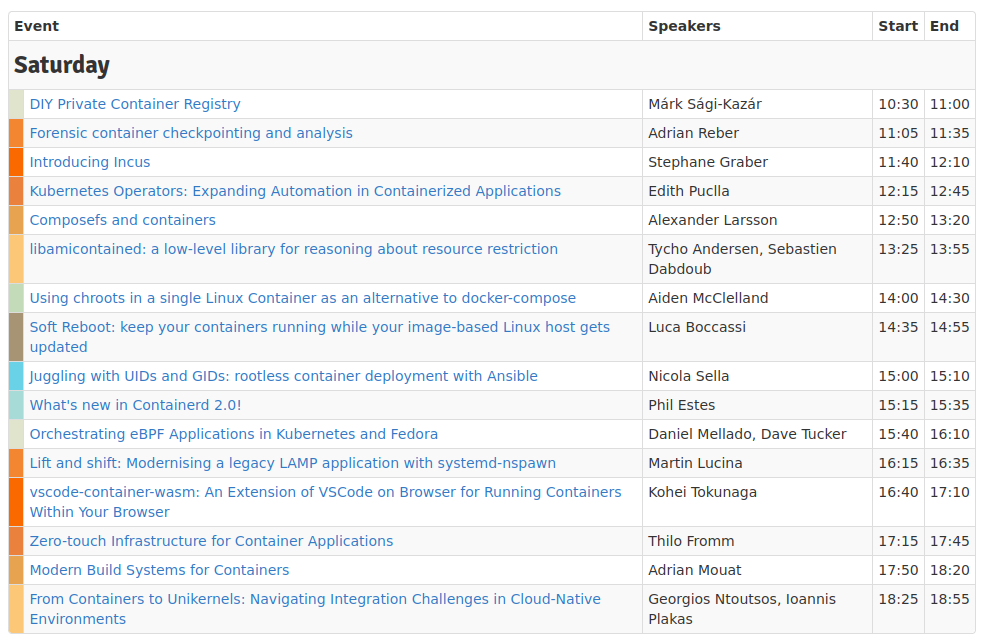
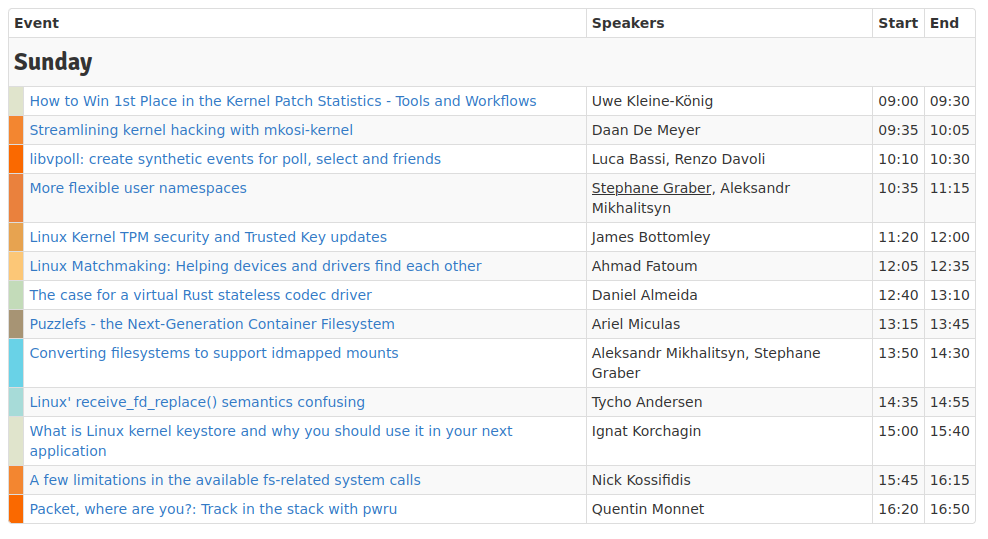
And so, after a few days of voting and scheduling, I present to you the schedules for the containers and kernel devrooms at FOSDEM!
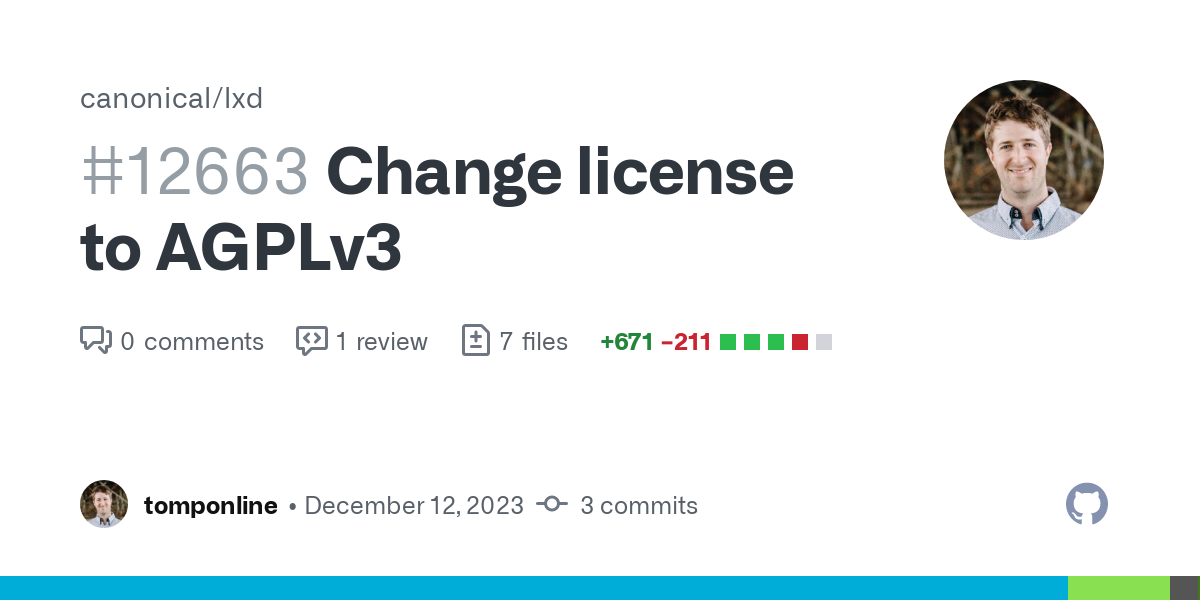
As of earlier today, right before the release of LXD 5.20, Canonical made a couple of changes to LXD which are sure to have a serious impact to LXD users and downstream projects that integrate with LXD or provide solutions based on it.
What’s below is my personal analysis of the situation, it is not legal advice, anyone affected is very strongly encouraged to seek proper legal advice from their counsel.
Real license of LXD
Per the commit message performing the re-licensing, all further contributions will be under the AGPLv3 license and all contributions from Canonical employees have been re-licensed to AGPLv3.
However, Canonical does not own the copyright on any contribution from non-employees, such as the many changes they have imported from Incus over the past few months. Those therefore remain under the Apache 2.0 license that they were contributed under.
As a result, LXD is now under a weird mix of Apache 2.0 and AGPLv3 with no clear metadata indicating what file or what part of each file is under one license or the other.
This is likely to make it very “fun” for anyone performing licensing reviews to evaluate LXD for adoption in their environment.
Impact to LXD users
For LXD users, other than potentially triggering corporate policies that ban the use of AGPLv3 software (more common than one may think), the impact should be minimal. It’s still the same LXD and it’s still open source software.
However, if you were altering LXD in any way, then you will need to familiarize yourself with the AGPLv3 license as unlike Apache 2.0, it does require any changes be made available under the AGPLv3 even if you don’t expose your users to your modified binaries. This is the main design characteristics of the AGPLv3 license, it was meant to force those operating modified versions of open source as a hosted service to share their modifications.
Impact to downstreams (consumer of LXD Go packages)
Up until now, all the Go packages of LXD were under the Apache 2.0 license, that was fitting quite well in the Go ecosystem where the Apache 2.0, BSDs and MIT licenses are very popular.
Now with this change, you need to realize that you may start to include/bundle AGPLv3 code within your own project. This a copyleft license and so may require re-licensing of your own project to comply with it.
Again, this is quite the can of worms, with my usual recommendation being “stay away”, but if you must use any of LXD’s Go packages, I’d strongly recommend talking to a lawyer to fully understand your exposure to that new license.
Impact on Incus
Now for what obviously impacts me the most, what this is going to do to Incus.
As a brief reminder Incus is a fork of LXD which was started in August 2023. So far, it’s been tracking LXD changes, applying those that make sense and otherwise fixing bugs and making improvements of its own, as most forks do.
This change from Canonical is going to be causing two unfortunate side effects:
Incus will no longer be including changes originating from LXD as that would require us to include AGPLv3 code into our codebase and so get us into the same mixed license mess as LXD now put itself. This is obviously unacceptable to us, we very much like licensing clarity and quite enjoy the Apache 2.0 license.
LXD will similarly no longer be able to take changes from Incus, as those are going to remain under the Apache 2.0 license and more importantly, will not have been released under the Canonical CLA.
To enforce that second part, the tooling we’ve been using thus far to monitor LXD changes and automatically backport them to Incus will be used to detect any changes to LXD which originated from Incus. Unless the author gave express consent for them to be released under a different license and under the Canonical CLA, those changes should not be included in LXD.
Incus is also a consumer of the LXD Go API in the lxd-to-incus tool. Thankfully, we have no need for anything recent in there, so will simply be making sure that we never import code past the licensing change.
Conclusion
Overall, I’m very disappointed, although absolutely not surprised in seeing this change happen. It’s certainly going to be quite annoying for Incus, and I suspect this is the whole point of it.
But it’s also a very odd move by Canonical as it puts LXD into a problematic grey area as far as its true license is concerned which will likely seriously hurt its adoption both by companies and distributions.
In any case, I’d urge anyone who has concerns about this change to reach out to their legal representation and maybe consider switching over to Incus where we will happily keep releasing our CLA-free Apache 2.0 licensed fork of this once great project.
Update (2023/12/12)
I’ve seen a number of people point out that Apache 2.0 is compatible with the AGPLv3 and that’s certainly correct, however compatibility doesn’t mean that the code in question suddenly becomes AGPLv3, it means that it can be included in an AGPLv3 project. So I’d still expect there to be good tracking of the license of the individual files / code chunks so that someone can tell whether a particular piece of code is AGPLv3 or Apache 2.0, this is currently not possible.
The code mentions headers (probably SPDX) to be present whenever code isn’t AGPLv3, but no such headers were introduced at time of writing.
The announcement also very specifically spells out that past contributions are not being re-licensed and therefore remain under the Apache 2.0 license, though again, there is currently no way to identify what contributions that is. So this still leads to LXD now being a mix of AGPLv3 and Apache 2.0 with no way to figure out which is which.
All that’s known for sure is that all new contributions are to be under AGPLv3 and must be from copyright holders (author or employer) who has signed the Canonical CLA. Those two will preclude the inclusion of any Incus code in LXD moving forward.
Update (2023/12/14)
Canonical now seems to be trying to get around the fact that Incus isn’t AGPLv3 by marking the code they import from us as Apache 2.0 in the commit message. While this is definitely fine from a licensing standpoint given the compatibility between AGPLv3 and Apache 2.0 license, it still violates their requirement that all new contributions be under the Canonical CLA.
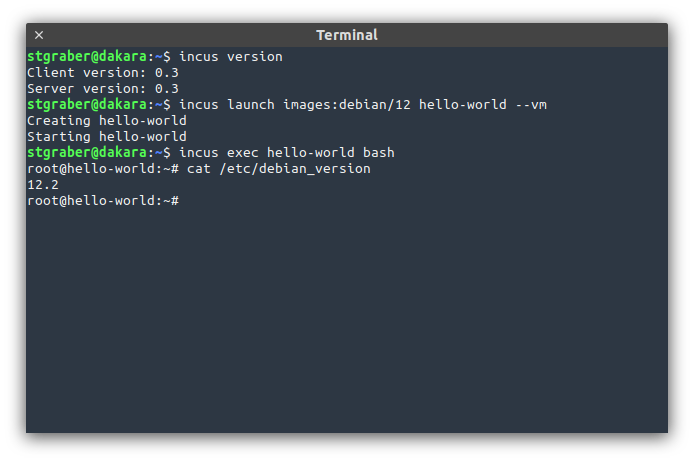
Another month, another Incus release! Incus 0.3 is now out, featuring OpenFGA support, a lot of improvements to our migration tool and support for hot-plug/hot-remove of shared paths in virtual machines.
The full announcement and changelog can be found here. And for those who prefer videos, here’s the release overview video:
Finally just a quick reminder that my company is now offering commercial support on Incus, ranging from by-the-hour support contracts to one-off services on things like initial migration from LXD, review of your deployment to squeeze the most out of Incus or even feature sponsorship. You’ll find all details of that here: https://zabbly.com/incus
Donations towards my work on this and other open source projects is also always appreciated, you can find me on Github Sponsors, Patreon and Ko-fi.
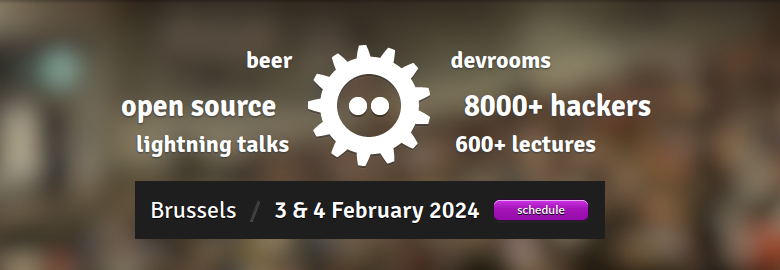
As has become a bit of a tradition by now, I’ll be attending FOSDEM 2024 in Brussels, Belgium on the weekend of the 3-4th of February 2024.
I’m once again one of the organizers of the containers devroom, a devroom we’ve been running for over 5 years now. And on top of that, will also help organize the kernel devroom. This is going to be our second year for this devroom after a very successful first year in 2023!
The CFPs for both devrooms are currently still open with a submission deadline of December 10th:
If you have anything that’s containers or kernel related, please send it, we have a variety of time slot lengths to accommodate anything from a short demo to a full size talk.
But those are just two of a lot of different devrooms running over the weekend, you can find a full list here along with all the CFP links.
See you in Brussels!
PS: A good chunk of the LXC/Incus team is going to be attending, so let us know if you want to chat and we’ll try to find some time!
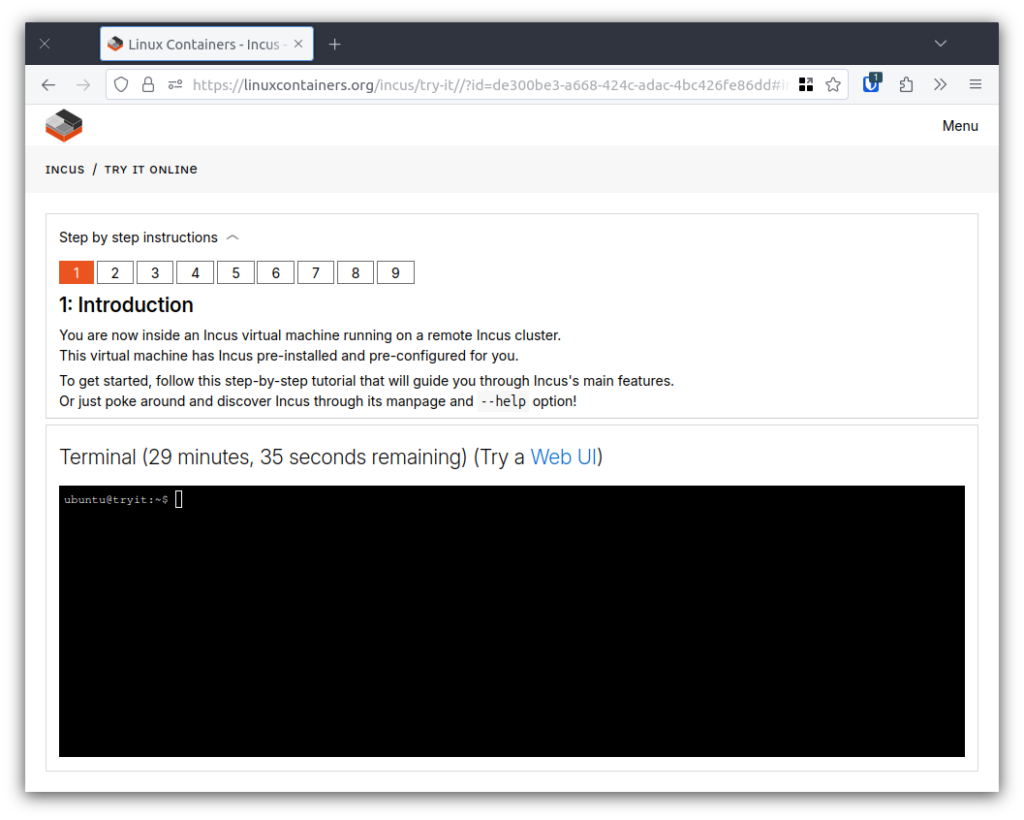
For anyone who hasn’t seen it before, you can try the Incus container and virtual machine manager online by just heading to our website and starting a demo session.
This gets you a dedicated VM on an Incus cluster with a bunch of resources and with a 30min time limit so you can either poke around for yourself or go through our guided showcase.
Now as neat as this is, it’s nothing new and we’ve been offering this for quite a while.
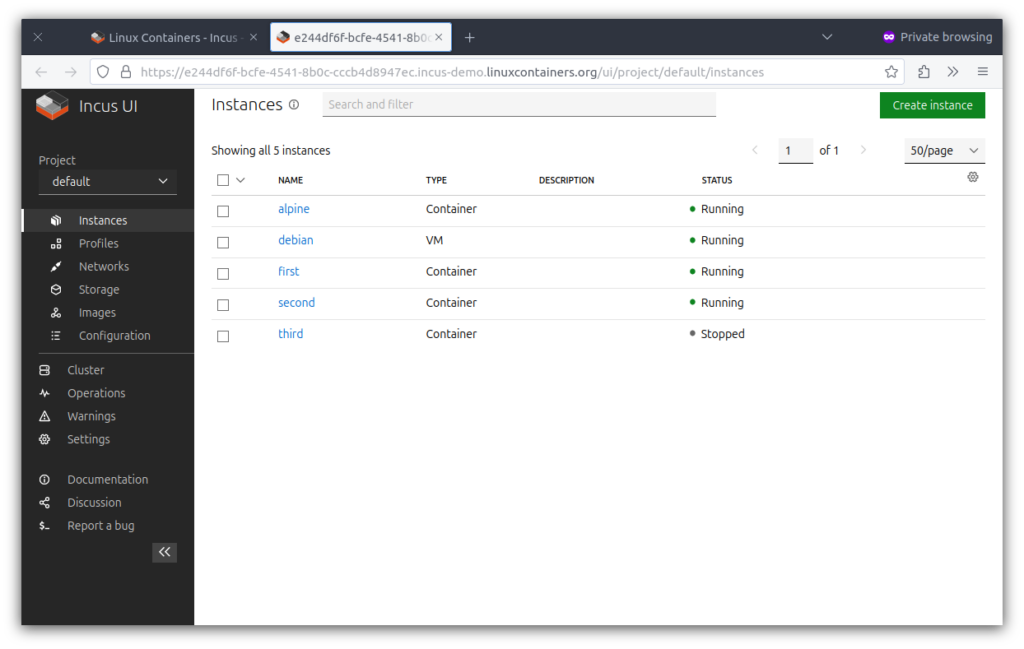
What’s new is that “Try a Web UI” link you can see alongside the console timer, click it and you’ll be getting into a web app that lets you play with the same temporary Incus server as the regular text demo.
What web UI?
Unlike LXD, Incus doesn’t have an official web UI. Instead, it just serves whatever web UI you want.
That means that getting a stateless (javascript + html only) web UI is as simple as unpacking a bunch of files in /opt/incus/ui/ and then accessing Incus from a web browser. For more complex, stateful web UIs (those using dynamic server-side languages or an external database), a simple index.html file can be dropped into /opt/incus/ui/ to then redirect the user to the correct web server.
Part of that work was to also do some minimal re-branding, changing some links and updating the list of config options so it matches Incus. That’s handled as a series of patches that are applied during the package build.
How does it all work?
Now to get this available for anyone as part of the online demo service, some work had to be done!
The first part was the easy one, simply get the incus-ui-canonical package installed in our demo image. Those images are generated through a simple shell script, building a new base image every day.
With the package present and Incus configured to listen on the network, the next step was to add a bunch of logic to the incus-demo-server codebase. Each demo session is identified by a UUID. You can see that UUID in the URL whenever you start a demo session.
When a new session is created, a database record is made which amongst other things records the IPv6 address of the instance. Until now, this wasn’t really used other than for debugging purposes.
Now the easy approach would have been to just provide the IPv6 address to the end user and so long as they have IPv6 connectivity, they could just access the web UI directly. There are a few problems with that approach though:
Adoption rate for IPv6 is only slightly above 50% when looking at Incus users
The target web server (Incus) doesn’t have a valid TLS certificate
Authentication in the web UI requires a client certificate in the user’s browser
This would have made for a very high bar for anyone to try the UI, something better was needed. And so that’s where the idea of having incus-demo-server act as a SNI-aware proxy came about.
The setup basically looks like:
User hits https://<UUID>.incus-demo-linuxcontainers.org
Wildcard DNS record catches *.incus-demo.linuxcontainers.org and sends to HAProxy
HAProxy uses a valid Let’s Encrypt wildcard certificate to answer
HAProxy forwards the traffic to incus-demo-server on a dedicated port, keeping the SNI (Server Name Indication) value
incus-demo-server inspects the SNI value, extracts the instance UUID and gets the target IPv6 address from its database
incus-demo-server forwards the traffic to the Incus server running in the instance, using its own TLS client certificate for that connection
This results in the end user being able to access the web UI in their temporary instance with a valid HTTPS certificate and without needing to worry about authentication at all.
You can find the incus-demo-server side of this logic here.
Conclusion
I believe this turned out to be a very elegant trick, making things as easy as humanly possible for anyone to try Incus, letting them mix and match using the CLI or using a web UI.
As mentioned, there is no such thing as an official web UI with Incus, so we’re looking forward to getting some more of the alternative web UIs packaged and will be looking at ways to offer them up on the demo service too, likely by having the user install whichever one they want through the terminal.


 Github
 Twitter
 LinkedIn
 Mastodon