The Incus team is pleased to announce the release of Incus 6.15!
This is one of those releases which has a bit of everything, improvements for application containers, VMs, clustering, networking and even some CLI enhancements.
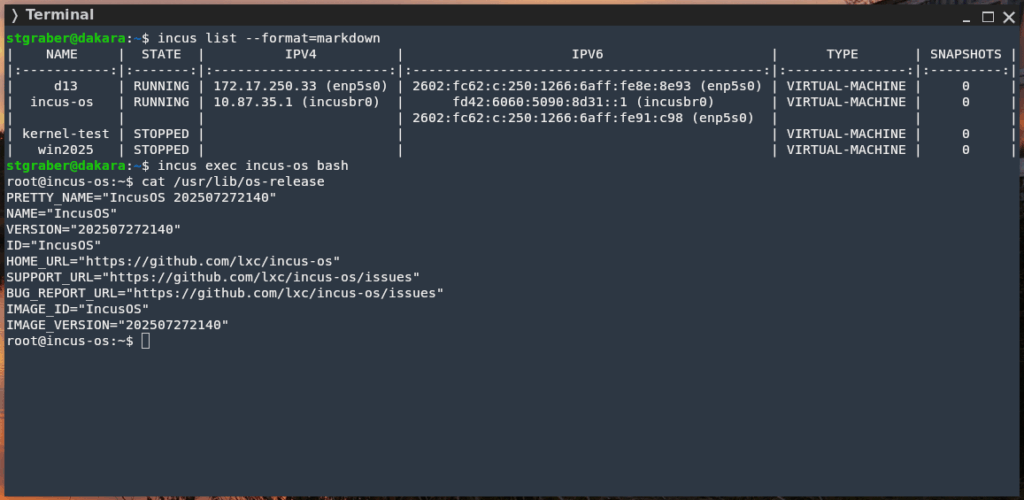
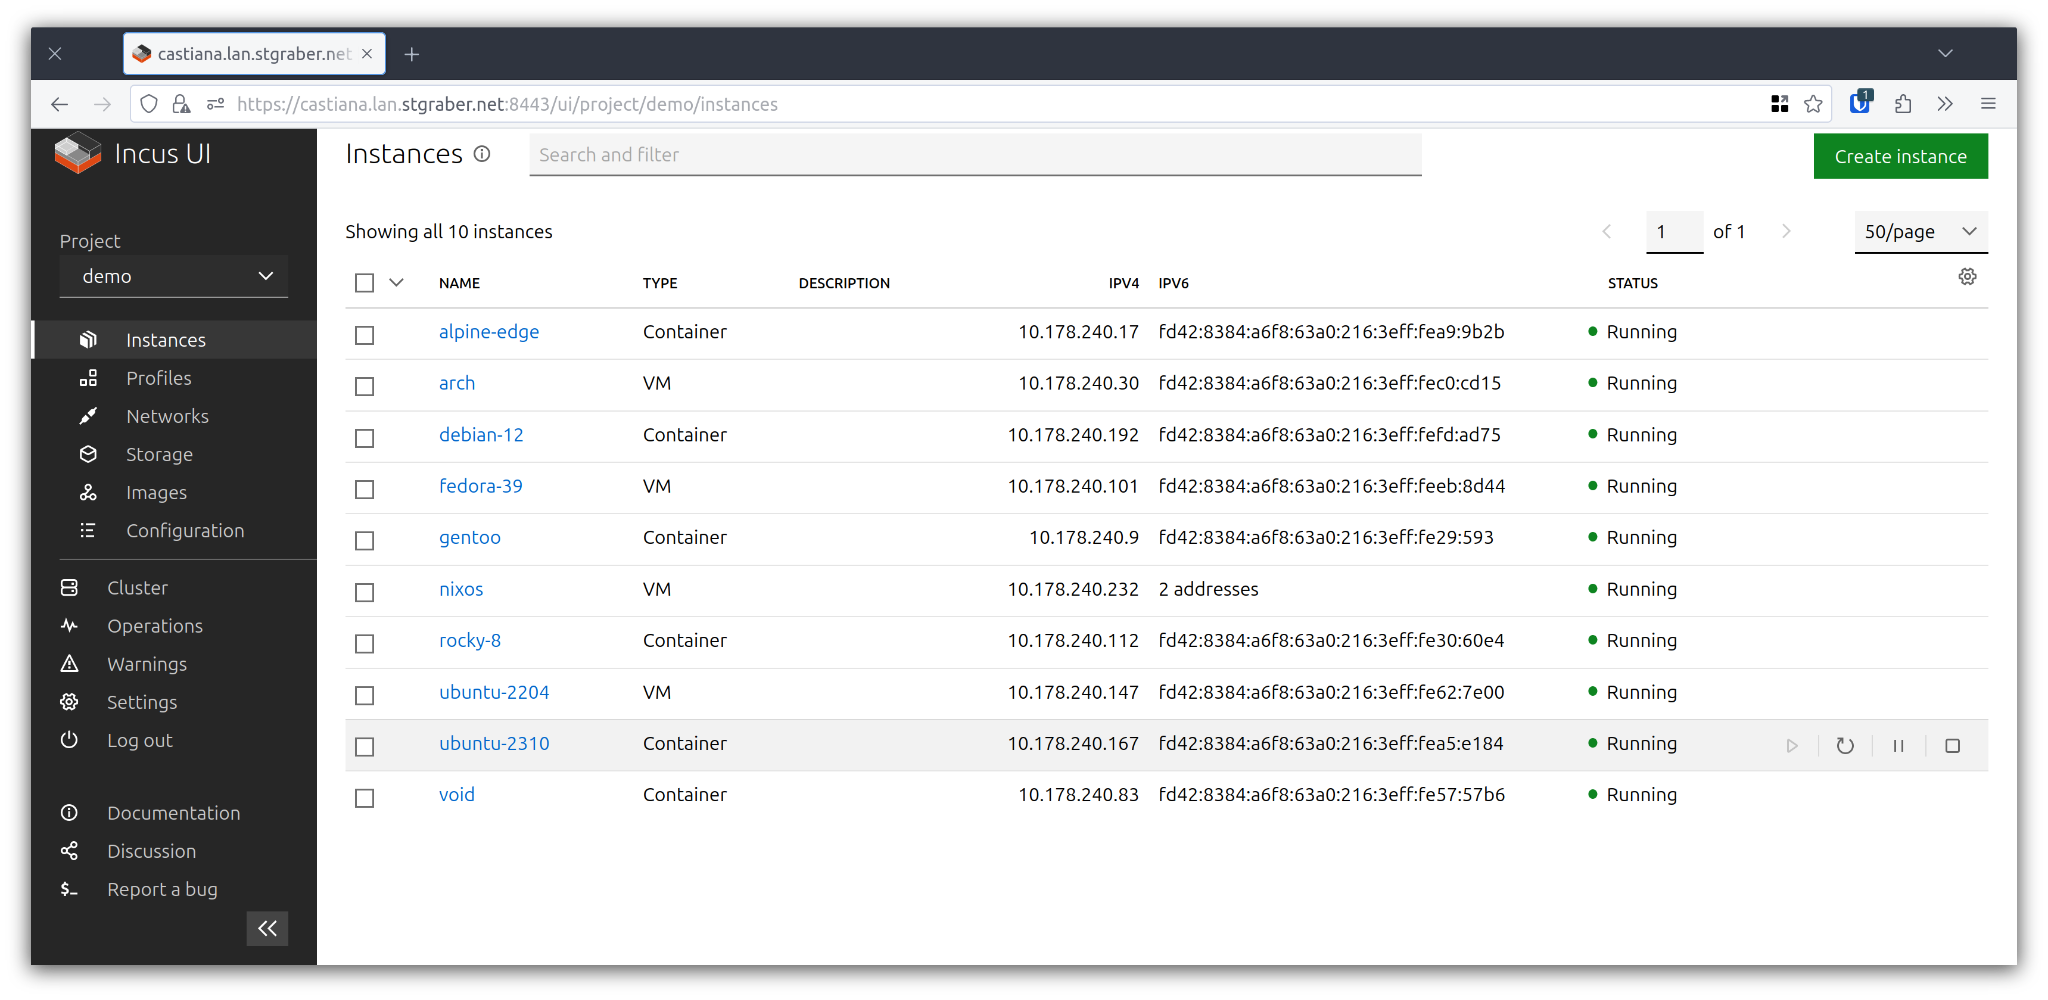
Worth noting that we’ve also made some good progress on Incus OS and now use it to run the online demo environment. We’ve also made a new downloading tool for it with instructions available here.
The highlights for this release are:
Authentication support for OCI registries
Webhook as a logging target
More control over memory hotplug behavior in VMs
Persistent CD-ROM ejection in VMs
Configurable WWN for disk devices in VMs
Dynamic IPv6 network address
Configurable keepalive mode in the CLI
Markdown output in the CLI
More server-side filtering support in the CLI
The full announcement and changelog can be found here. And for those who prefer videos, here’s the release overview video:
And as always, my company is offering commercial support on Incus, ranging from by-the-hour support contracts to one-off services on things like initial migration from LXD, review of your deployment to squeeze the most out of Incus or even feature sponsorship. You’ll find all details of that here: https://zabbly.com/incus
Donations towards my work on this and other open source projects is also always appreciated, you can find me on Github Sponsors, Patreon and Ko-fi.
As a reminder, Zabbly is the company I created for my freelance work. Most of it is Incus related these days, though I also make and publish some mainline kernel builds, ZFS packages and OVS/OVN packages!
On top of that, Zabbly also owns my various ARIN resources (ASN, allocations, …) as well as my hosting/datacenter contracts.
Through Zabbly I offer a mix of by-the-hour consultation with varying prices depending on the urgency of the work (basic consultation, support, emergency support) as well as fixed-cost services, mostly related to Incus (infrastructure review, migration from LXD, remote or on-site trainings, …).
Zabbly is also the legal entity for donations related to my open source work, currently supporting:
And lastly, Zabbly also runs a Youtube channel covering the various projects I’m involved with. That part grew quite a bit over the past year, with subscriber count up 75%, frequent live streams and release videos. The channel is now part of the YouTube Partner program.
FuturFusion
In addition to the work I’m doing through Zabbly. I’m also the CTO and co-founder of FuturFusion.
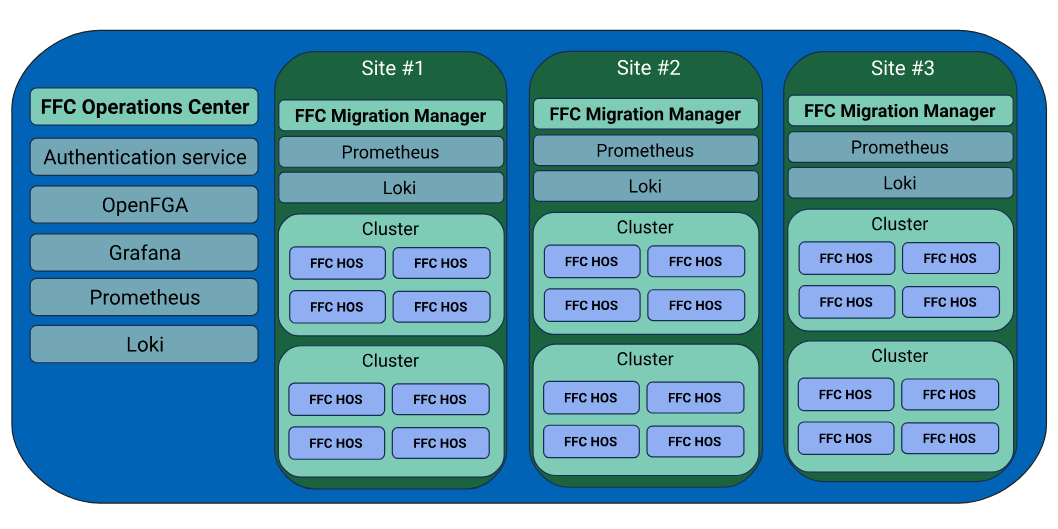
FuturFusion is focused on providing a full private cloud solution to enterprise customers, primarily those looking for an alternative to VMware. The solution is comprised of:
Incus clusters
Hypervisor OS (based on Incus OS)
Operations Center (provisioning, global inventory, update management, ..)
While Zabbly is just a one person show, FuturFusion has a global team and offers 24/7 support.
All components of the FuturFusion Cloud suite are fully open-source (Apache 2.0). FuturFusion customers get access to fully tested and supported builds of the software stack.
Incus
A lot has been going on with Incus over the past year!
Some of the main feature highlights are:
OCI application containers support
Automatic cluster re-balancing
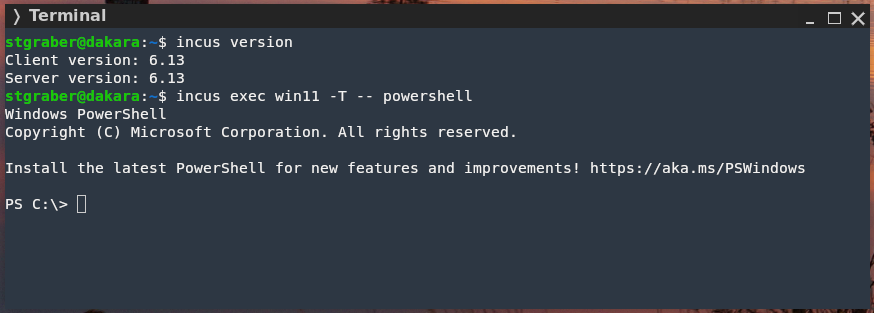
Windows support for the VM agent
Linstor storage driver
Network address sets
A lot of OVN improvements (native client, ECMP for interconnect, load-balancer monitoring, ability to run isolated networks, inclusion of physical interfaces into OVN, …)
A lot of VM improvements (OS reporting, baseline CPU calculation, console history, import of existing QCOW2/VMDK/OVA images, live-migration of VM storage, screenshot API, IOMMU support, USB virtual devices, memory hotplug, …)
We also acquired (through Zabbly) our own MAC address prefix and transitioned all our projects over to that!
The University of Texas in Austin once again decided to actively contribute to Incus, leading to dozens of contributions by students, clearing quite a bit of our feature request backlog.
And I can’t talk about recent Incus work without talking about Incus OS. This is recent initiative to build our own immutable OS image, just to run Incus. It’s designed to be as safe as possible and easy to operate at large scale. I recently traveled to the Linux Security Summit to talk about it.
Two more things also happened that are definitely worth mentioning, the first is the decision by TrueNAS Scale to use Incus as the built-in virtualization solution. This has introduced Incus to a LOT of new people and we’re looking forward to some exciting integration work coming very soon!
The other is a significant investment from the Sovereign Tech Fund, funding quite a bit of Incus work this year, from our work on LTS bugfix releases to the aforementioned Windows agent and a major refresh of our development lab!
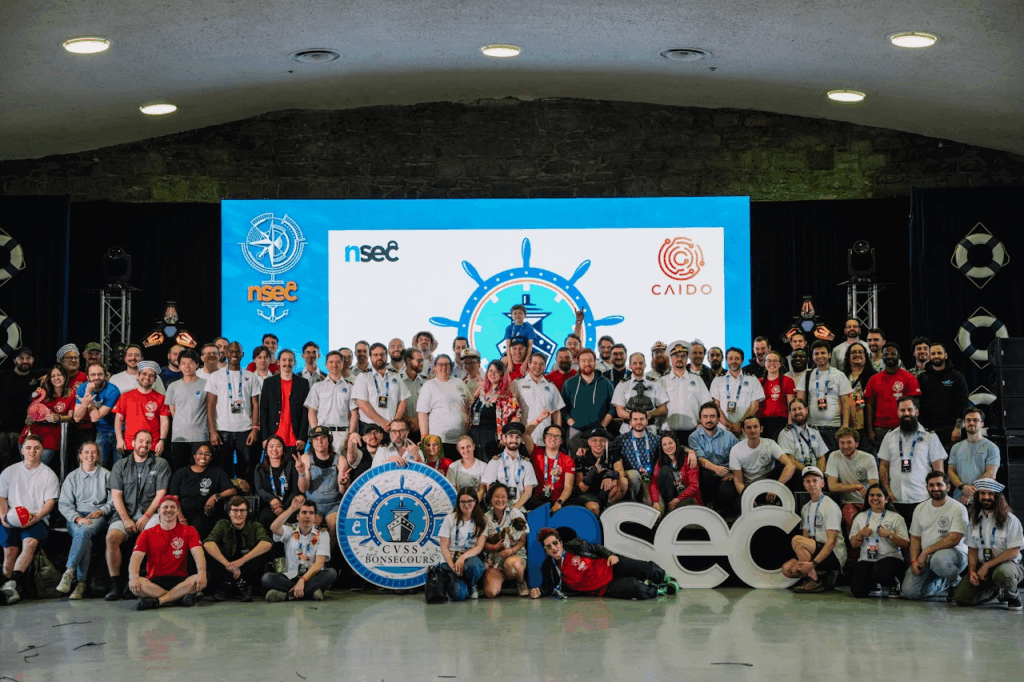
NorthSec
NorthSec is a yearly cybersecurity conference, CTF and training provider, usually happening in late May in Montreal, Canada. It’s been operating since 2013 and is now one of the largest on-site CTF events in the world along with having a pretty sizable conference too.
There are two main Incus-related highlights for NorthSec this year.
First, all the on-site routing and compute was running on Incus OS. This was still extremely early days with this being (as far as I know) the first deployment of Incus OS on real server hardware, but it all went off without a hitch!
The second is that we leaned very hard on Infrastructure As Code this year, especially on the CTF part of the event. All challenges this year were published through a combination of Terraform and Ansible, using their respective providers/plugins for Incus. The entire CTF could be re-deployed from scratch in less than an hour and we got to also benefit from pretty extensive CI through Github Actions.
For the next edition we’re looking at moving more of the infrastructure over to Incus OS and make sure that all our Incus cluster configuration and objects are tracked in Terraform.
Conferences
Similar to last year, I’ve been keeping conference travel to a lower amount than I was once used to 🙂
But I still managed to make it to:
Linux Plumbers Conference 2024 (in Vienna, Austria)
Ran the containers & checkpoint/restore micro-conference and talked about immutable process tags
This will likely be it as far as conference travel for 2025 as I don’t expect to make it in person to Linux Plumbers this year, though I intend to still handle the CFP for the containers/checkpoint-restore micro-conference and attend the event remotely.
What’s next
I expect the coming year to be just as busy as this past year!
Incus OS is getting close to its first beta, opening it up to wider usage and with it, more feature requests and tweaks! We’ve been focusing on its use for large customers that get centrally provisioned and managed, but the intent is for Incus OS to also be a great fit for the homelab environment and we have exciting plans to make that as seamless as possible!
Incus itself also keeps getting better. We have some larger new features coming up, like the ability to run OCI images in virtual machines, the aforementioned TrueNAS storage driver, a variety of OVN improvements and more!
And of course, working with my customers, both through Zabbly and at FuturFusion to support their needs and to plan for the future!
The Incus team is pleased to announce the release of Incus 6.14!
This is a lighter release with quite a few welcome bugfixes and performance improvements, wrapping up some of the work with the University of Texas students and adding a few smaller features.
It also fixes a couple of security issues affecting those using network ACLs on bridge networks using nftables and network isolation.
The highlights for this release are:
S3 upload of instance and volume backups
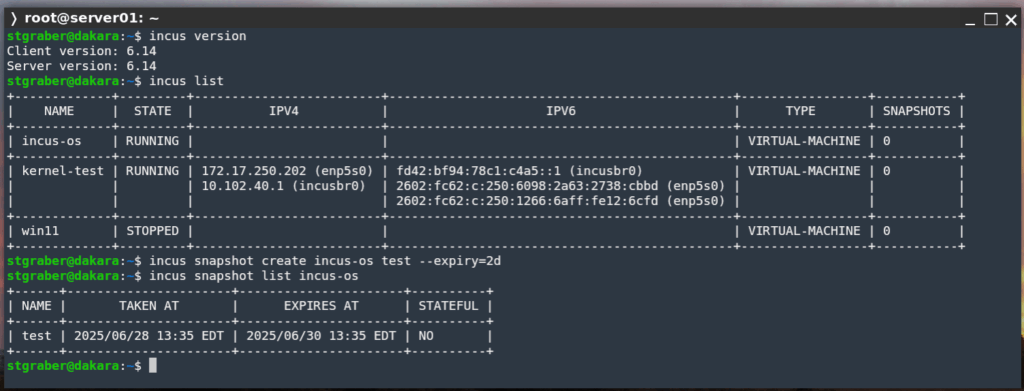
Customizable expiry on snapshot creation
Alternative default expiry for manually created snapshots
Live migration tweaks and progress reporting
Reporting of CPU address sizes in the resources API
Database logic moved to our code generator
The full announcement and changelog can be found here. And for those who prefer videos, here’s the release overview video:
And as always, my company is offering commercial support on Incus, ranging from by-the-hour support contracts to one-off services on things like initial migration from LXD, review of your deployment to squeeze the most out of Incus or even feature sponsorship. You’ll find all details of that here: https://zabbly.com/incus
Donations towards my work on this and other open source projects is also always appreciated, you can find me on Github Sponsors, Patreon and Ko-fi.
The Incus team is pleased to announce the release of Incus 6.12!
This release comes with some very long awaited improvements such as online growth of virtual machine memory, network address sets for easier network ACLs, revamped logging support and more!
On top of the new features, this release also features quite a few welcome performance improvements, especially for systems with a lot of snapshots and with extra performance enhancements for those using ZFS.
The highlights for this release are:
Network address sets
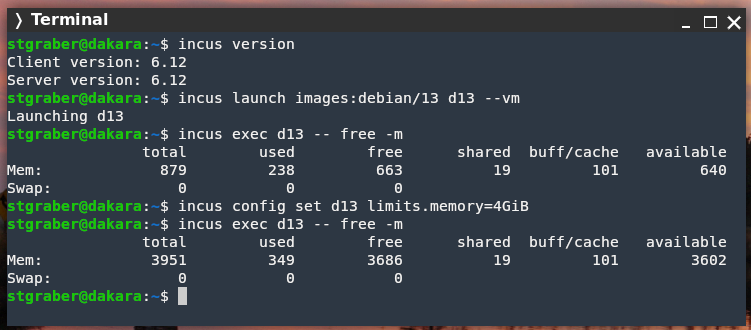
Memory hotplug support in VMs
Reworked logging handling & remote syslog
SNAT support on complex network forwards
Authentication through access_token parameter
Improved server-side filtering in the CLI
More generated documentation
The full announcement and changelog can be found here. And for those who prefer videos, here’s the release overview video:
And as always, my company is offering commercial support on Incus, ranging from by-the-hour support contracts to one-off services on things like initial migration from LXD, review of your deployment to squeeze the most out of Incus or even feature sponsorship. You’ll find all details of that here: https://zabbly.com/incus
Donations towards my work on this and other open source projects is also always appreciated, you can find me on Github Sponsors, Patreon and Ko-fi.


 Github
 Twitter
 LinkedIn
 Mastodon