

LXD on other operating systems?
While LXD and especially its API have been designed in a mostly OS-agnostic way, the only OS supported for the daemon right now is Linux (and a rather recent Linux at that).
However since all the communications between the client and daemon happen over a REST API, there is no reason why our default client wouldn’t work on other operating systems.
And it does. We in fact gate changes to the client on having it build and pass unit tests on Linux, Windows and MacOS.
This means that you can run one or more LXD daemons on Linux systems on your network and then interact with those remotely from any Linux, Windows or MacOS machine.
Setting up your LXD daemon
We’ll be connecting to the LXD daemon over the network, so you’ll need to make sure it’s listening and has a password configured so that new clients can add themselves to the trust store.
This can be done with:
lxc config set core.https_address "[::]:8443"
lxc config set core.trust_password "my-password"
In my case, that remote LXD can be reached with “djanet.maas.mtl.stgraber.net”, you’ll want to replace that with your LXD server’s FQDN or IP in the commands used below.
Windows client
Pre-built native binaries
Our Windows CI service builds a tarball for every commit. You can grab the latest one here:
https://ci.appveyor.com/project/lxc/lxd/branch/master/artifacts
Then unpack the archive and open a command prompt in the directory where you unpacked the lxc.exe binary.
Build from source
Alternatively, you can build it from source, by first installing Go using the latest MSI based installer from https://golang.org/dl/ and then Git from https://git-scm.com/downloads.
And then in a command prompt, run:
git config --global http.https://gopkg.in.followRedirects true
go get -v -x github.com/lxc/lxd/lxc
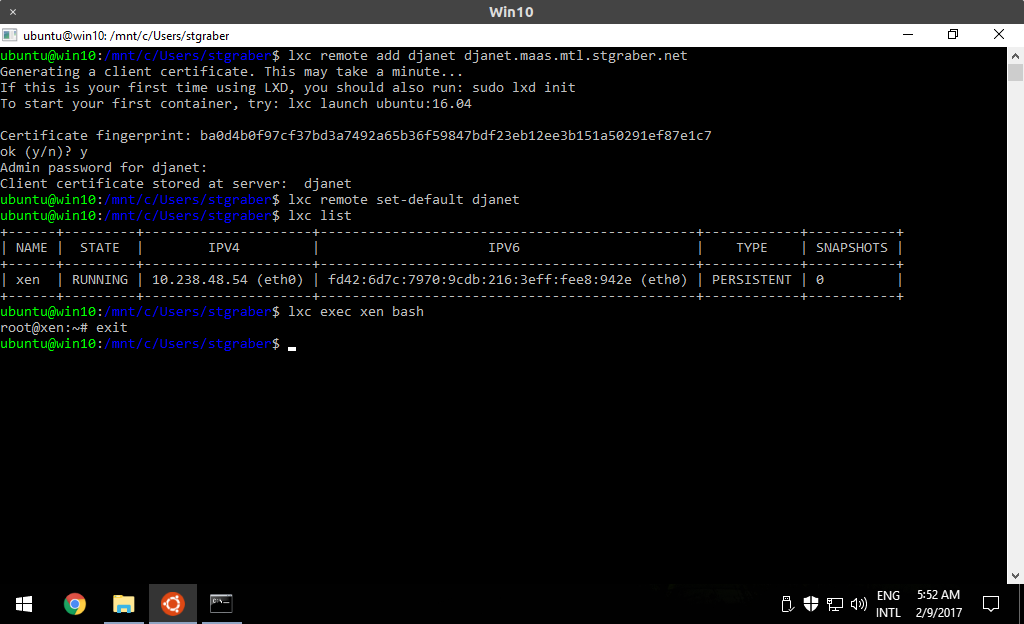
Use Ubuntu on Windows (“bash”)
For this, you need to use Windows 10 and have the Windows subsystem for Linux enabled.
With that done, start an Ubuntu shell by launching “bash”. And you’re done.
The LXD client is installed by default in the Ubuntu 16.04 image.
Interact with the remote server
Regardless of which method you picked, you’ve now got access to the “lxc” command and can add your remote server.
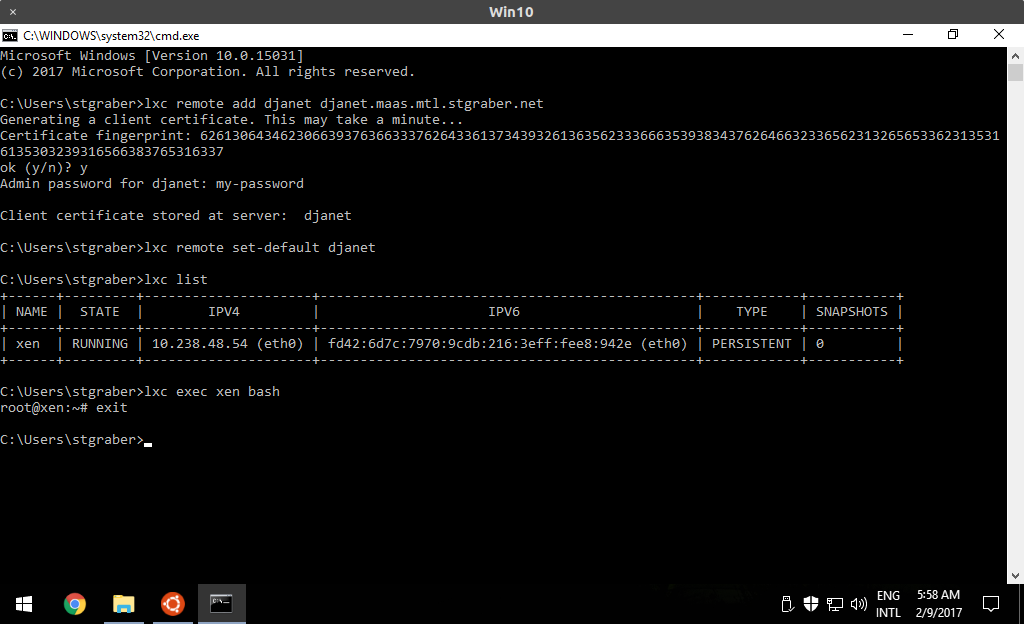
Using the native build does have a few restrictions to do with Windows terminal escape codes, breaking things like the arrow keys and password hiding. The Ubuntu on Windows way uses the Linux version of the LXD client and so doesn’t suffer from those limitations.
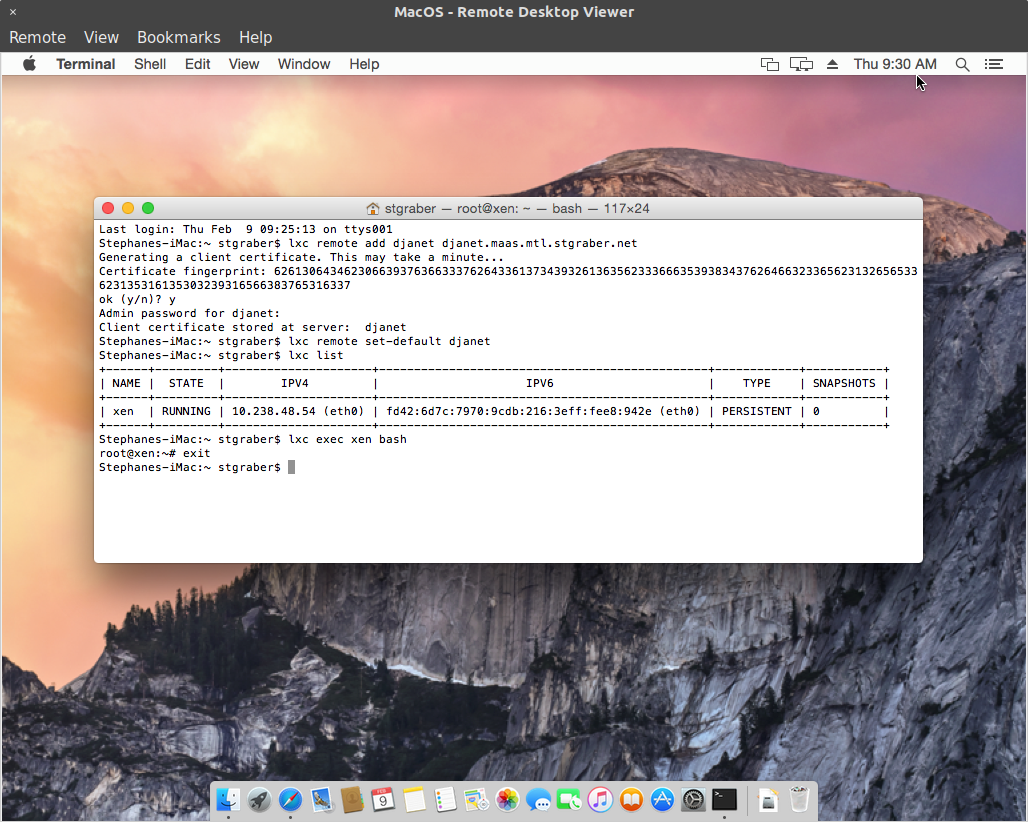
MacOS client
Even though we do have MacOS CI through Travis, they don’t host artifacts for us and so don’t have prebuilt binaries for people to download.
Build from source
Similarly to the Windows instructions, you can build the LXD client from source, by first installing Go using the latest DMG based installer from https://golang.org/dl/ and then Git from https://git-scm.com/downloads.
Once that’s done, open a new Terminal window and run:
export GOPATH=~/go
go get -v -x github.com/lxc/lxd/lxc
sudo ln -s ~/go/bin/lxc /usr/local/bin/
At which point you can use the “lxc” command.
Conclusion
The LXD client can be built on all the main operating systems and on just about every architecture, this makes it very easy for anyone to interact with existing LXD servers, whether they’re themselves using a Linux machine or not.
Thanks to our pretty strict backward compatibility rules, the version of the client doesn’t really matter. Older clients can talk to newer servers and newer clients can talk to older servers. Obviously in both cases some features will not be available, but normal container worflow operations will work fine.
Extra information
The main LXD website is at: https://linuxcontainers.org/lxd
Development happens on Github at: https://github.com/lxc/lxd
Mailing-list support happens on: https://lists.linuxcontainers.org
IRC support happens in: #lxcontainers on irc.freenode.net
Try LXD online: https://linuxcontainers.org/lxd/try-it

 Github
 Twitter
 LinkedIn
 Mastodon