Category Archives: LXD

LXD 2.0: Docker in LXD [7/12]

This is the seventh blog post in this series about LXD 2.0.

LXD logo

Why run Docker inside LXD

As I briefly covered in the first post of this series, LXD’s focus is system containers. That is, we run a full unmodified Linux distribution inside our containers. LXD for all intent and purposes doesn’t care about the workload running in the container. It just sets up the container namespaces and security policies, then spawns /sbin/init and waits for the container to stop.

Application containers such as those implemented by Docker or Rkt are pretty different in that they are used to distribute applications, will typically run a single main process inside them and be much more ephemeral than a LXD container.

Those two container types aren’t mutually exclusive and we certainly see the value of using Docker containers to distribute applications. That’s why we’ve been working hard over the past year to make it possible to run Docker inside LXD.

This means that with Ubuntu 16.04 and LXD 2.0, you can create containers for your users who will then be able to connect into them just like a normal Ubuntu system and then run Docker to install the services and applications they want.

Requirements

There are a lot of moving pieces to make all of this working and we got it all included in Ubuntu 16.04:

  • A kernel with CGroup namespace support (4.4 Ubuntu or 4.6 mainline)
  • LXD 2.0 using LXC 2.0 and LXCFS 2.0
  • A custom version of Docker (or one built with all the patches that we submitted)
  • A Docker image which behaves when confined by user namespaces, or alternatively make the parent LXD container a privileged container (security.privileged=true)

Running a basic Docker workload

Enough talking, lets run some Docker containers!

First of all, you need an Ubuntu 16.04 container which you can get with:

lxc launch ubuntu-daily:16.04 docker -c security.nesting=true

Now lets make sure the container is up to date and install docker:

lxc exec docker -- apt update
lxc exec docker -- apt dist-upgrade -y
lxc exec docker -- apt install docker.io -y

And that’s it! You’ve got Docker installed and running in your container.
Now lets start a basic web service made of two Docker containers:

stgraber@dakara:~$ lxc exec docker -- docker run --detach --name app carinamarina/hello-world-app
Unable to find image 'carinamarina/hello-world-app:latest' locally
latest: Pulling from carinamarina/hello-world-app
efd26ecc9548: Pull complete 
a3ed95caeb02: Pull complete 
d1784d73276e: Pull complete 
72e581645fc3: Pull complete 
9709ddcc4d24: Pull complete 
2d600f0ec235: Pull complete 
c4cf94f61cbd: Pull complete 
c40f2ab60404: Pull complete 
e87185df6de7: Pull complete 
62a11c66eb65: Pull complete 
4c5eea9f676d: Pull complete 
498df6a0d074: Pull complete 
Digest: sha256:6a159db50cb9c0fbe127fb038ed5a33bb5a443fcdd925ec74bf578142718f516
Status: Downloaded newer image for carinamarina/hello-world-app:latest
c8318f0401fb1e119e6c5bb23d1e706e8ca080f8e44b42613856ccd0bf8bfb0d

stgraber@dakara:~$ lxc exec docker -- docker run --detach --name web --link app:helloapp -p 80:5000 carinamarina/hello-world-web
Unable to find image 'carinamarina/hello-world-web:latest' locally
latest: Pulling from carinamarina/hello-world-web
efd26ecc9548: Already exists 
a3ed95caeb02: Already exists 
d1784d73276e: Already exists 
72e581645fc3: Already exists 
9709ddcc4d24: Already exists 
2d600f0ec235: Already exists 
c4cf94f61cbd: Already exists 
c40f2ab60404: Already exists 
e87185df6de7: Already exists 
f2d249ff479b: Pull complete 
97cb83fe7a9a: Pull complete 
d7ce7c58a919: Pull complete 
Digest: sha256:c31cf04b1ab6a0dac40d0c5e3e64864f4f2e0527a8ba602971dab5a977a74f20
Status: Downloaded newer image for carinamarina/hello-world-web:latest
d7b8963401482337329faf487d5274465536eebe76f5b33c89622b92477a670f

With those two Docker containers now running, we can then get the IP address of our LXD container and access the service!

stgraber@dakara:~$ lxc list
+--------+---------+----------------------+----------------------------------------------+------------+-----------+
|  NAME  |  STATE  |         IPV4         |                      IPV6                    |    TYPE    | SNAPSHOTS |
+--------+---------+----------------------+----------------------------------------------+------------+-----------+
| docker | RUNNING | 172.17.0.1 (docker0) | 2001:470:b368:4242:216:3eff:fe55:45f4 (eth0) | PERSISTENT | 0         |
|        |         | 10.178.150.73 (eth0) |                                              |            |           |
+--------+---------+----------------------+----------------------------------------------+------------+-----------+

stgraber@dakara:~$ curl http://10.178.150.73
The linked container said... "Hello World!"

Conclusion

That’s it! It’s really that simple to run Docker containers inside a LXD container.

Now as I mentioned earlier, not all Docker images will behave as well as my example, that’s typically because of the extra confinement that comes with LXD, specifically the user namespace.

Only the overlayfs storage driver of Docker works in this mode. That storage driver may come with its own set of limitation which may further limit how many images will work in this environment.

If your workload doesn’t work properly and you trust the user inside the LXD container, you can try:

lxc config set docker security.privileged true
lxc restart docker

That will de-activate the user namespace and will run the container in privileged mode.
Note however that in this mode, root inside the container is the same uid as root on the host. There are a number of known ways for users to escape such containers and gain root privileges on the host, so you should only ever do that if you’d trust the user inside your LXD container with root privileges on the host.

Extra information

The main LXD website is at: https://linuxcontainers.org/lxd
Development happens on Github at: https://github.com/lxc/lxd
Mailing-list support happens on: https://lists.linuxcontainers.org
IRC support happens in: #lxcontainers on irc.freenode.net
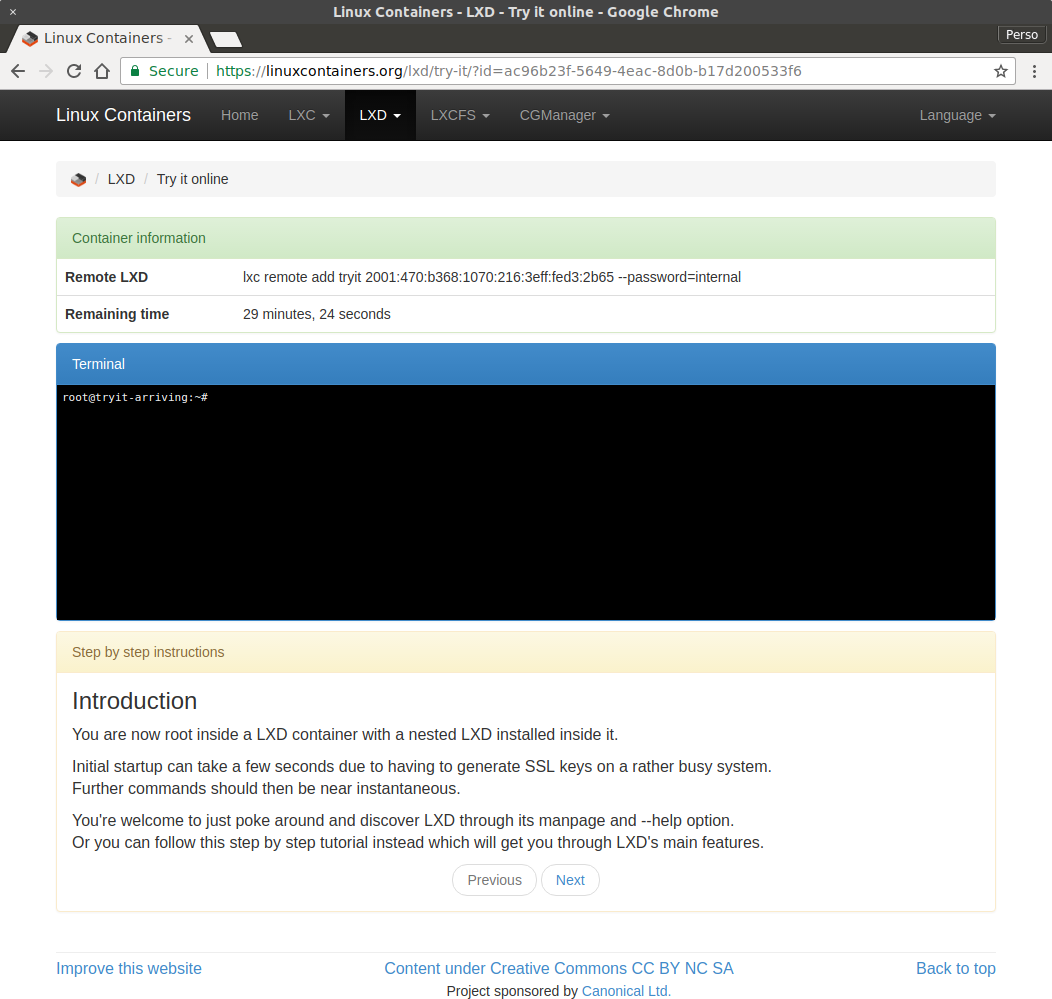
Try LXD online: https://linuxcontainers.org/lxd/try-it

Posted in Canonical voices, LXD, Planet Ubuntu | Tagged | 55 Comments

LXD 2.0: Remote hosts and container migration [6/12]

This is the sixth blog post in this series about LXD 2.0.

LXD logo

Remote protocols

LXD 2.0 supports two protocols:

  • LXD 1.0 API: That’s the REST API used between the clients and a LXD daemon as well as between LXD daemons when copying/moving images and containers.
  • Simplestreams: The Simplestreams protocol is a read-only, image-only protocol used by both the LXD client and daemon to get image information and import images from some public image servers (like the Ubuntu images).

Everything below will be using the first of those two.

Security

Authentication for the LXD API is done through client certificate authentication over TLS 1.2 using recent ciphers. When two LXD daemons must exchange information directly, a temporary token is generated by the source daemon and transferred through the client to the target daemon. This token may only be used to access a particular stream and is immediately revoked so cannot be re-used.

To avoid Man In The Middle attacks, the client tool also sends the certificate of the source server to the target. That means that for a particular download operation, the target server is provided with the source server URL, a one-time access token for the resource it needs and the certificate that the server is supposed to be using. This prevents MITM attacks and only give temporary access to the object of the transfer.

Network requirements

LXD 2.0 uses a model where the target of an operation (the receiving end) is connecting directly to the source to fetch the data.

This means that you must ensure that the target server can connect to the source directly, updating any needed firewall along the way.

We have a plan to allow this to be reversed and also to allow proxying through the client itself for those rare cases where draconian firewalls are preventing any communication between the two hosts.

Interacting with remote hosts

Rather than having our users have to always provide hostname or IP addresses and then validating certificate information whenever they want to interact with a remote host, LXD is using the concept of “remotes”.

By default, the only real LXD remote configured is “local:” which also happens to be the default remote (so you don’t have to type its name). The local remote uses the LXD REST API to talk to the local daemon over a unix socket.

Adding a remote

Say you have two machines with LXD installed, your local machine and a remote host that we’ll call “foo”.

First you need to make sure that “foo” is listening to the network and has a password set, so get a remote shell on it and run:

lxc config set core.https_address [::]:8443
lxc config set core.trust_password something-secure

Now on your local LXD, we just need to make it visible to the network so we can transfer containers and images from it:

lxc config set core.https_address [::]:8443

Now that the daemon configuration is done on both ends, you can add “foo” to your local client with:

lxc remote add foo 1.2.3.4

(replacing 1.2.3.4 by your IP address or FQDN)

You’ll see something like this:

stgraber@dakara:~$ lxc remote add foo 2607:f2c0:f00f:2770:216:3eff:fee1:bd67
Certificate fingerprint: fdb06d909b77a5311d7437cabb6c203374462b907f3923cefc91dd5fce8d7b60
ok (y/n)? y
Admin password for foo: 
Client certificate stored at server: foo

You can then list your remotes and you’ll see “foo” listed there:

stgraber@dakara:~$ lxc remote list
+-----------------+-------------------------------------------------------+---------------+--------+--------+
|      NAME       |                         URL                           |   PROTOCOL    | PUBLIC | STATIC |
+-----------------+-------------------------------------------------------+---------------+--------+--------+
| foo             | https://[2607:f2c0:f00f:2770:216:3eff:fee1:bd67]:8443 | lxd           | NO     | NO     |
+-----------------+-------------------------------------------------------+---------------+--------+--------+
| images          | https://images.linuxcontainers.org:8443               | lxd           | YES    | NO     |
+-----------------+-------------------------------------------------------+---------------+--------+--------+
| local (default) | unix://                                               | lxd           | NO     | YES    |
+-----------------+-------------------------------------------------------+---------------+--------+--------+
| ubuntu          | https://cloud-images.ubuntu.com/releases              | simplestreams | YES    | YES    |
+-----------------+-------------------------------------------------------+---------------+--------+--------+
| ubuntu-daily    | https://cloud-images.ubuntu.com/daily                 | simplestreams | YES    | YES    |
+-----------------+-------------------------------------------------------+---------------+--------+--------+

Interacting with it

Ok, so we have a remote server defined, what can we do with it now?

Well, just about everything you saw in the posts until now, the only difference being that you must tell LXD what host to run against.

For example:

lxc launch ubuntu:14.04 c1

Will run on the default remote (“lxc remote get-default”) which is your local host.

lxc launch ubuntu:14.04 foo:c1

Will instead run on foo.

Listing running containers on a remote host can be done with:

stgraber@dakara:~$ lxc list foo:
+------+---------+---------------------+-----------------------------------------------+------------+-----------+
| NAME |  STATE  |         IPV4        |                     IPV6                      |    TYPE    | SNAPSHOTS |
+------+---------+---------------------+-----------------------------------------------+------------+-----------+
| c1   | RUNNING | 10.245.81.95 (eth0) | 2607:f2c0:f00f:2770:216:3eff:fe43:7994 (eth0) | PERSISTENT | 0         |
+------+---------+---------------------+-----------------------------------------------+------------+-----------+

One thing to keep in mind is that you have to specify the remote host for both images and containers. So if you have a local image called “my-image” on “foo” and want to create a container called “c2” from it, you have to run:

lxc launch foo:my-image foo:c2

Finally, getting a shell into a remote container works just as you would expect:

lxc exec foo:c1 bash

Copying containers

Copying containers between hosts is as easy as it sounds:

lxc copy foo:c1 c2

And you’ll have a new local container called “c2” created from a copy of the remote “c1” container. This requires “c1” to be stopped first, but you could just copy a snapshot instead and do it while the source container is running:

lxc snapshot foo:c1 current
lxc copy foo:c1/current c3

Moving containers

Unless you’re doing live migration (which will be covered in a later post), you have to stop the source container prior to moving it, after which everything works as you’d expect.

lxc stop foo:c1
lxc move foo:c1 local:

This example is functionally identical to:

lxc stop foo:c1
lxc move foo:c1 c1

How this all works

Interactions with remote containers work as you would expect, rather than using the REST API over a local Unix socket, LXD just uses the exact same API over a remote HTTPS transport.

Where it gets a bit trickier is when interaction between two daemons must occur, as is the case for copy and move.

In those cases the following happens:

  1. The user runs “lxc move foo:c1 c1”.
  2. The client contacts the local: remote to check for an existing “c1” container.
  3. The client fetches container information from “foo”.
  4. The client requests a migration token from the source “foo” daemon.
  5. The client sends that migration token as well as the source URL and “foo”‘s certificate to the local LXD daemon alongside the container configuration and devices.
  6. The local LXD daemon then connects directly to “foo” using the provided token
    1. It connects to a first control websocket
    2. It negotiates the filesystem transfer protocol (zfs send/receive, btrfs send/receive or plain rsync)
    3. If available locally, it unpacks the image which was used to create the source container. This is to avoid needless data transfer.
    4. It then transfers the container and any of its snapshots as a delta.
  7. If succesful, the client then instructs “foo” to delete the source container.

Try all this online

Don’t have two machines to try remote interactions and moving/copying containers?

That’s okay, you can test it all online using our demo service.
The included step-by-step walkthrough even covers it!

Extra information

The main LXD website is at: https://linuxcontainers.org/lxd
Development happens on Github at: https://github.com/lxc/lxd
Mailing-list support happens on: https://lists.linuxcontainers.org
IRC support happens in: #lxcontainers on irc.freenode.net

Posted in Canonical voices, LXD, Planet Ubuntu | Tagged | 28 Comments

LXD 2.0 has been released!

LXD logo

Introduction

And that’s it!
After a year and a half of intense work by the LXD team, LXD 2.0 has been released today!

LXD 2.0 is our first production-ready release and also a Long Term Support release, meaning that we will be supporting it with frequent bugfix releases until the 1st of June 2021.

This also completes our collection of 2.0 container tools with LXC 2.0, LXCFS 2.0 and now LXD 2.0 all having been released over the past couple of weeks.

Getting started with LXD

I have recently been writing a bit about LXD 2.0, those posts are a great starting point to understand LXD’s goal and start using it for your own containers.

LXD 2.0 is now available in Ubuntu 16.04, Ubuntu 14.04 (through backports) and in the Ubuntu Core Store.

We expect other Linux distributions to pick it up over the next few weeks!

More information on how to install it can be found here.

Try it online

If you just want to see what LXD is all about without having to start a virtual machine or install it on your own machine, you can try it online straight from our website.

Just head to: https://linuxcontainers.org/lxd/try-it

Project information

Upstream website: https://linuxcontainers.org/lxd/
Release announcement: https://linuxcontainers.org/lxd/news/
Code: https://github.com/lxc/lxd
IRC channel: #lxcontainers on irc.freenode.net
Mailing-lists: https://lists.linuxcontainers.org

Posted in Canonical voices, LXD, Planet Ubuntu | Tagged | 9 Comments

LXD 2.0: Image management [5/12]

This is the fifth blog post in this series about LXD 2.0.

LXD logo

Container images

If you’ve used LXC before, you probably remember those LXC “templates”, basically shell scripts that spit out a container filesystem and a bit of configuration.

Most templates generate the filesystem by doing a full distribution bootstrapping on your local machine. This may take quite a while, won’t work for all distributions and may require significant network bandwidth.

Back in LXC 1.0, I wrote a “download” template which would allow users to download pre-packaged container images, generated on a central server from the usual template scripts and then heavily compressed, signed and distributed over https. A lot of our users switched from the old style container generation to using this new, much faster and much more reliable method of creating a container.

With LXD, we’re taking this one step further by being all-in on the image based workflow. All containers are created from an image and we have advanced image caching and pre-loading support in LXD to keep the image store up to date.

Interacting with LXD images

Before digging deeper into the image format, lets quickly go through what LXD lets you do with those images.

Transparently importing images

All containers are created from an image. The image may have come from a remote image server and have been pulled using its full hash, short hash or an alias, but in the end, every LXD container is created from a local image.

Here are a few examples:

lxc launch ubuntu:14.04 c1
lxc launch ubuntu:75182b1241be475a64e68a518ce853e800e9b50397d2f152816c24f038c94d6e c2
lxc launch ubuntu:75182b1241be c3

All of those refer to the same remote image (at the time of this writing), the first time one of those is run, the remote image will be imported in the local LXD image store as a cached image, then the container will be created from it.

The next time one of those commands are run, LXD will only check that the image is still up to date (when not referring to it by its fingerprint), if it is, it will create the container without downloading anything.

Now that the image is cached in the local image store, you can also just start it from there without even checking if it’s up to date:

lxc launch 75182b1241be c4

And lastly, if you have your own local image under the name “myimage”, you can just do:

lxc launch my-image c5

If you want to change some of that automatic caching and expiration behavior, there are instructions in an earlier post in this series.

Manually importing images

Copying from an image server

If you want to copy some remote image into your local image store but not immediately create a container from it, you can use the “lxc image copy” command. It also lets you tweak some of the image flags, for example:

lxc image copy ubuntu:14.04 local:

This simply copies the remote image into the local image store.

If you want to be able to refer to your copy of the image by something easier to remember than its fingerprint, you can add an alias at the time of the copy:

lxc image copy ubuntu:12.04 local: --alias old-ubuntu
lxc launch old-ubuntu c6

And if you would rather just use the aliases that were set on the source server, you can ask LXD to copy the for you:

lxc image copy ubuntu:15.10 local: --copy-aliases
lxc launch 15.10 c7

All of the copies above were one-shot copy, so copying the current version of the remote image into the local image store. If you want to have LXD keep the image up to date, as it does for the ones stored in its cache, you need to request it with the –auto-update flag:

lxc image copy images:gentoo/current/amd64 local: --alias gentoo --auto-update

Importing a tarball

If someone provides you with a LXD image as a single tarball, you can import it with:

lxc image import <tarball>

If you want to set an alias at import time, you can do it with:

lxc image import <tarball> --alias random-image

Now if you were provided with two tarballs, identify which contains the LXD metadata. Usually the tarball name gives it away, if not, pick the smallest of the two, metadata tarballs are tiny. Then import them both together with:

lxc image import <metadata tarball> <rootfs tarball>

Importing from a URL

“lxc image import” also works with some special URLs. If you have an https web server which serves a path with the LXD-Image-URL and LXD-Image-Hash headers set, then LXD will pull that image into its image store.

For example you can do:

lxc image import https://dl.stgraber.org/lxd --alias busybox-amd64

When pulling the image, LXD also sets some headers which the remote server could check to return an appropriate image. Those are LXD-Server-Architectures and LXD-Server-Version.

This is meant as a poor man’s image server. It can be made to work with any static web server and provides a user friendly way to import your image.

Managing the local image store

Now that we have a bunch of images in our local image store, lets see what we can do with them. We’ve already covered the most obvious, creating containers from them but there are a few more things you can do with the local image store.

Listing images

To get a list of all images in the store, just run “lxc image list”:

stgraber@dakara:~$ lxc image list
+---------------+--------------+--------+------------------------------------------------------+--------+----------+------------------------------+
|     ALIAS     | FINGERPRINT  | PUBLIC |                     DESCRIPTION                      |  ARCH  |   SIZE   |         UPLOAD DATE          |
+---------------+--------------+--------+------------------------------------------------------+--------+----------+------------------------------+
| alpine-32     | 6d9c131efab3 | yes    | Alpine edge (i386) (20160329_23:52)                  | i686   | 2.50MB   | Mar 30, 2016 at 4:36am (UTC) |
+---------------+--------------+--------+------------------------------------------------------+--------+----------+------------------------------+
| busybox-amd64 | 74186c79ca2f | no     | Busybox x86_64                                       | x86_64 | 0.79MB   | Mar 30, 2016 at 4:33am (UTC) |
+---------------+--------------+--------+------------------------------------------------------+--------+----------+------------------------------+
| gentoo        | 1a134c5951e0 | no     | Gentoo current (amd64) (20160329_14:12)              | x86_64 | 232.50MB | Mar 30, 2016 at 4:34am (UTC) |
+---------------+--------------+--------+------------------------------------------------------+--------+----------+------------------------------+
| my-image      | c9b6e738fae7 | no     | Scientific Linux 6 x86_64 (default) (20160215_02:36) | x86_64 | 625.34MB | Mar 2, 2016 at 4:56am (UTC)  |
+---------------+--------------+--------+------------------------------------------------------+--------+----------+------------------------------+
| old-ubuntu    | 4d558b08f22f | no     | ubuntu 12.04 LTS amd64 (release) (20160315)          | x86_64 | 155.09MB | Mar 30, 2016 at 4:30am (UTC) |
+---------------+--------------+--------+------------------------------------------------------+--------+----------+------------------------------+
| w (11 more)   | d3703a994910 | no     | ubuntu 15.10 amd64 (release) (20160315)              | x86_64 | 153.35MB | Mar 30, 2016 at 4:31am (UTC) |
+---------------+--------------+--------+------------------------------------------------------+--------+----------+------------------------------+
|               | 75182b1241be | no     | ubuntu 14.04 LTS amd64 (release) (20160314)          | x86_64 | 118.17MB | Mar 30, 2016 at 4:27am (UTC) |
+---------------+--------------+--------+------------------------------------------------------+--------+----------+------------------------------+

You can filter based on the alias or fingerprint simply by doing:

stgraber@dakara:~$ lxc image list amd64
+---------------+--------------+--------+-----------------------------------------+--------+----------+------------------------------+
|     ALIAS     | FINGERPRINT  | PUBLIC |               DESCRIPTION               |  ARCH  |   SIZE   |          UPLOAD DATE         |
+---------------+--------------+--------+-----------------------------------------+--------+----------+------------------------------+
| busybox-amd64 | 74186c79ca2f | no     | Busybox x86_64                          | x86_64 | 0.79MB   | Mar 30, 2016 at 4:33am (UTC) |
+---------------+--------------+--------+-----------------------------------------+--------+----------+------------------------------+
| w (11 more)   | d3703a994910 | no     | ubuntu 15.10 amd64 (release) (20160315) | x86_64 | 153.35MB | Mar 30, 2016 at 4:31am (UTC) |
+---------------+--------------+--------+-----------------------------------------+--------+----------+------------------------------+

Or by specifying a key=value filter of image properties:

stgraber@dakara:~$ lxc image list os=ubuntu
+-------------+--------------+--------+---------------------------------------------+--------+----------+------------------------------+
|    ALIAS    | FINGERPRINT  | PUBLIC |                  DESCRIPTION                |  ARCH  |   SIZE   |          UPLOAD DATE         |
+-------------+--------------+--------+---------------------------------------------+--------+----------+------------------------------+
| old-ubuntu  | 4d558b08f22f | no     | ubuntu 12.04 LTS amd64 (release) (20160315) | x86_64 | 155.09MB | Mar 30, 2016 at 4:30am (UTC) |
+-------------+--------------+--------+---------------------------------------------+--------+----------+------------------------------+
| w (11 more) | d3703a994910 | no     | ubuntu 15.10 amd64 (release) (20160315)     | x86_64 | 153.35MB | Mar 30, 2016 at 4:31am (UTC) |
+-------------+--------------+--------+---------------------------------------------+--------+----------+------------------------------+
|             | 75182b1241be | no     | ubuntu 14.04 LTS amd64 (release) (20160314) | x86_64 | 118.17MB | Mar 30, 2016 at 4:27am (UTC) |
+-------------+--------------+--------+---------------------------------------------+--------+----------+------------------------------+

To see everything LXD knows about a given image, you can use “lxc image info”:

stgraber@castiana:~$ lxc image info ubuntu
Fingerprint: e8a33ec326ae7dd02331bd72f5d22181ba25401480b8e733c247da5950a7d084
Size: 139.43MB
Architecture: i686
Public: no
Timestamps:
 Created: 2016/03/15 00:00 UTC
 Uploaded: 2016/03/16 05:50 UTC
 Expires: 2017/04/26 00:00 UTC
Properties:
 version: 12.04
 aliases: 12.04,p,precise
 architecture: i386
 description: ubuntu 12.04 LTS i386 (release) (20160315)
 label: release
 os: ubuntu
 release: precise
 serial: 20160315
Aliases:
 - ubuntu
Auto update: enabled
Source:
 Server: https://cloud-images.ubuntu.com/releases
 Protocol: simplestreams
 Alias: precise/i386

Editing images

A convenient way to edit image properties and some of the flags is to use:

lxc image edit <alias or fingerprint>

This opens up your default text editor with something like this:

autoupdate: true
properties:
 aliases: 14.04,default,lts,t,trusty
 architecture: amd64
 description: ubuntu 14.04 LTS amd64 (release) (20160314)
 label: release
 os: ubuntu
 release: trusty
 serial: "20160314"
 version: "14.04"
public: false

You can change any property you want, turn auto-update on and off or mark an image as publicly available (more on that later).

Deleting images

Remove an image is a simple matter of running:

lxc image delete <alias or fingerprint>

Note that you don’t have to remove cached entries, those will automatically be removed by LXD after they expire (by default, after 10 days since they were last used).

Exporting images

If you want to get image tarballs from images currently in your image store, you can use “lxc image export”, like:

stgraber@dakara:~$ lxc image export old-ubuntu .
Output is in .
stgraber@dakara:~$ ls -lh *.tar.xz
-rw------- 1 stgraber domain admins 656 Mar 30 00:55 meta-ubuntu-12.04-server-cloudimg-amd64-lxd.tar.xz
-rw------- 1 stgraber domain admins 156M Mar 30 00:55 ubuntu-12.04-server-cloudimg-amd64-lxd.tar.xz

Image formats

LXD right now supports two image layouts, unified or split. Both of those are effectively LXD-specific though the latter makes it easier to re-use the filesystem with other container or virtual machine runtimes.

LXD being solely focused on system containers, doesn’t support any of the application container “standard” image formats out there, nor do we plan to.

Our images are pretty simple, they’re made of a container filesystem, a metadata file describing things like when the image was made, when it expires, what architecture its for, … and optionally a bunch of file templates.

See this document for up to date details on the image format.

Unified image (single tarball)

The unified image format is what LXD uses when generating images itself. They are a single big tarball, containing the container filesystem inside a “rootfs” directory, have the metadata.yaml file at the root of the tarball and any template goes into a “templates” directory.

Any compression (or none at all) can be used for that tarball. The image hash is the sha256 of the resulting compressed tarball.

Split image (two tarballs)

This format is most commonly used by anyone rolling their own images and who already have a compressed filesystem tarball.

They are made of two distinct tarball, the first contains just the metadata bits that LXD uses, so the metadata.yaml file at the root and any template in the “templates” directory.

The second tarball contains only the container filesystem directly at its root. Most distributions already produce such tarballs as they are common for bootstrapping new machines. This image format allows re-using them unmodified.

Any compression (or none at all) can be used for either tarball, they can absolutely use different compression algorithms. The image hash is the sha256 of the concatenation of the metadata and rootfs tarballs.

Image metadata

A typical metadata.yaml file looks something like:

architecture: "i686"
creation_date: 1458040200
properties:
 architecture: "i686"
 description: "Ubuntu 12.04 LTS server (20160315)"
 os: "ubuntu"
 release: "precise"
templates:
 /var/lib/cloud/seed/nocloud-net/meta-data:
  when:
   - start
  template: cloud-init-meta.tpl
 /var/lib/cloud/seed/nocloud-net/user-data:
  when:
   - start
  template: cloud-init-user.tpl
  properties:
   default: |
    #cloud-config
    {}
 /var/lib/cloud/seed/nocloud-net/vendor-data:
  when:
   - start
  template: cloud-init-vendor.tpl
  properties:
   default: |
    #cloud-config
    {}
 /etc/init/console.override:
  when:
   - create
  template: upstart-override.tpl
 /etc/init/tty1.override:
  when:
   - create
  template: upstart-override.tpl
 /etc/init/tty2.override:
  when:
   - create
  template: upstart-override.tpl
 /etc/init/tty3.override:
  when:
   - create
  template: upstart-override.tpl
 /etc/init/tty4.override:
  when:
   - create
  template: upstart-override.tpl

Properties

The two only mandatory fields are the creation date (UNIX EPOCH) and the architecture. Everything else can be left unset and the image will import fine.

The extra properties are mainly there to help the user figure out what the image is about. The “description” property for example is what’s visible in “lxc image list”. The other properties can be used by the user to search for specific images using key/value search.

Those properties can then be edited by the user through “lxc image edit” in contrast, the creation date and architecture fields are immutable.

Templates

The template mechanism allows for some files in the container to be generated or re-generated at some point in the container lifecycle.

We use the pongo2 templating engine for those and we export just about everything we know about the container to the template. That way you can have custom images which use user-defined container properties or normal LXD properties to change the content of some specific files.

As you can see in the example above, we’re using those in Ubuntu to seed cloud-init and to turn off some init scripts.

Creating your own images

LXD being focused on running full Linux systems means that we expect most users to just use clean distribution images and not spin their own image.

However there are a few cases where having your own images is useful. Such as having pre-configured images of your production servers or building your own images for a distribution or architecture that we don’t build images for.

Turning a container into an image

The easiest way by far to build an image with LXD is to just turn a container into an image.

This can be done with:

lxc launch ubuntu:14.04 my-container
lxc exec my-container bash
<do whatever change you want>
lxc publish my-container --alias my-new-image

You can even turn a past container snapshot into a new image:

lxc publish my-container/some-snapshot --alias some-image

Manually building an image

Building your own image is also pretty simple.

  1. Generate a container filesystem. This entirely depends on the distribution you’re using. For Ubuntu and Debian, it would be by using debootstrap.
  2. Configure anything that’s needed for the distribution to work properly in a container (if anything is needed).
  3. Make a tarball of that container filesystem, optionally compress it.
  4. Write a new metadata.yaml file based on the one described above.
  5. Create another tarball containing that metadata.yaml file.
  6. Import those two tarballs as a LXD image with:
    lxc image import <metadata tarball> <rootfs tarball> --alias some-name

You will probably need to go through this a few times before everything works, tweaking things here and there, possibly adding some templates and properties.

Publishing your images

All LXD daemons act as image servers. Unless told otherwise all images loaded in the image store are marked as private and so only trusted clients can retrieve those images, but should you want to make a public image server, all you have to do is tag a few images as public and make sure you LXD daemon is listening to the network.

Just running a public LXD server

The easiest way to share LXD images is to run a publicly visible LXD daemon.

You typically do that by running:

lxc config set core.https_address "[::]:8443"

Remote users can then add your server as a public image server with:

lxc remote add <some name> <IP or DNS> --public

They can then use it just as they would any of the default image servers. As the remote server was added with “–public”, no authentication is required and the client is restricted to images which have themselves been marked as public.

To change what images are public, just “lxc image edit” them and set the public flag to true.

Use a static web server

As mentioned above, “lxc image import” supports downloading from a static http server. The requirements are basically:

  • The server must support HTTPs with a valid certificate, TLS1.2 and EC ciphers
  • When hitting the URL provided to “lxc image import”, the server must return an answer including the LXD-Image-Hash and LXD-Image-URL HTTP headers

If you want to make this dynamic, you can have your server look for the LXD-Server-Architectures and LXD-Server-Version HTTP headers which LXD will provide when fetching the image. This allows you to return the right image for the server’s architecture.

Build a simplestreams server

The “ubuntu:” and “ubuntu-daily:” remotes aren’t using the LXD protocol (“images:” is), those are instead using a different protocol called simplestreams.

simplestreams is basically an image server description format, using JSON to describe a list of products and files related to those products.

It is used by a variety of tools like OpenStack, Juju, MAAS, … to find, download or mirror system images and LXD supports it as a native protocol for image retrieval.

While certainly not the easiest way to start providing LXD images, it may be worth considering if your images can also be used by some of those other tools.

More information can be found here.

Conclusion

I hope this gave you a good idea of how LXD manages its images and how to build and distribute your own. The ability to have the exact same image easily available bit for bit on a bunch of globally distributed system is a big step up from the old LXC days and leads the way to more reproducible infrastructure.

Extra information

The main LXD website is at: https://linuxcontainers.org/lxd
Development happens on Github at: https://github.com/lxc/lxd
Mailing-list support happens on: https://lists.linuxcontainers.org
IRC support happens in: #lxcontainers on irc.freenode.net

And if you don’t want or can’t install LXD on your own machine, you can always try it online instead!

Posted in Canonical voices, LXD, Planet Ubuntu | Tagged | 26 Comments

LXD 2.0: Resource control [4/12]

This is the fourth blog post in this series about LXD 2.0.

LXD logo

Available resource limits

LXD offers a variety of resource limits. Some of those are tied to the container itself, like memory quotas, CPU limits and I/O priorities. Some are tied to a particular device instead, like I/O bandwidth or disk usage limits.

As with all LXD configuration, resource limits can be dynamically changed while the container is running. Some may fail to apply, for example if setting a memory value smaller than the current memory usage, but LXD will try anyway and report back on failure.

All limits can also be inherited through profiles in which case each affected container will be constrained by that limit. That is, if you set limits.memory=256MB in the default profile, every container using the default profile (typically all of them) will have a memory limit of 256MB.

We don’t support resource limits pooling where a limit would be shared by a group of containers, there is simply no good way to implement something like that with the existing kernel APIs.

Disk

This is perhaps the most requested and obvious one. Simply setting a size limit on the container’s filesystem and have it enforced against the container.

And that’s exactly what LXD lets you do!
Unfortunately this is far more complicated than it sounds. Linux doesn’t have path-based quotas, instead most filesystems only have user and group quotas which are of little use to containers.

This means that right now LXD only supports disk limits if you’re using the ZFS or btrfs storage backend. It may be possible to implement this feature for LVM too but this depends on the filesystem being used with it and gets tricky when combined with live updates as not all filesystems allow online growth and pretty much none of them allow online shrink.

CPU

When it comes to CPU limits, we support 4 different things:

  • Just give me X CPUs
    In this mode, you let LXD pick a bunch of cores for you and then load-balance things as more containers and CPUs go online/offline.
    The container only sees that number of CPU.
  • Give me a specific set of CPUs (say, core 1, 3 and 5)
    Similar to the first mode except that no load-balancing is happening, you’re stuck with those cores no matter how busy they may be.
  • Give me 20% of whatever you have
    In this mode, you get to see all the CPUs but the scheduler will restrict you to 20% of the CPU time but only when under load! So if the system isn’t busy, your container can have as much fun as it wants. When containers next to it start using the CPU, then it gets capped.
  • Out of every measured 200ms, give me 50ms (and no more than that)
    This mode is similar to the previous one in that you get to see all the CPUs but this time, you can only use as much CPU time as you set in the limit, no matter how idle the system may be. On a system without over-commit this lets you slice your CPU very neatly and guarantees constant performance to those containers.

It’s also possible to combine one of the first two with one of the last two, that is, request a set of CPUs and then further restrict how much CPU time you get on those.

On top of that, we also have a generic priority knob which is used to tell the scheduler who wins when you’re under load and two containers are fighting for the same resource.

Memory

Memory sounds pretty simple, just give me X MB of RAM!

And it absolutely can be that simple. We support that kind of limits as well as percentage based requests, just give me 10% of whatever the host has!

Then we support some extra stuff on top. For example, you can choose to turn swap on and off on a per-container basis and if it’s on, set a priority so you can choose what container will have their memory swapped out to disk first!

Oh and memory limits are “hard” by default. That is, when you run out of memory, the kernel out of memory killer will start having some fun with your processes.

Alternatively you can set the enforcement policy to “soft”, in which case you’ll be allowed to use as much memory as you want so long as nothing else is. As soon as something else wants that memory, you won’t be able to allocate anything until you’re back under your limit or until the host has memory to spare again.

Network I/O

Network I/O is probably our simplest looking limit, trust me, the implementation really isn’t simple though!

We support two things. The first is a basic bit/s limits on network interfaces. You can set a limit of ingress and egress or just set the “max” limit which then applies to both. This is only supported for “bridged” and “p2p” type interfaces.

The second thing is a global network I/O priority which only applies when the network interface you’re trying to talk through is saturated.

Block I/O

I kept the weirdest for last. It may look straightforward and feel like that to the user but there are a bunch of cases where it won’t exactly do what you think it should.

What we support here is basically identical to what I described in Network I/O.

You can set IOps or byte/s read and write limits directly on a disk device entry and there is a global block I/O priority which tells the I/O scheduler who to prefer.

The weirdness comes from how and where those limits are applied. Unfortunately the underlying feature we use to implement those uses full block devices. That means we can’t set per-partition I/O limits let alone per-path.

It also means that when using ZFS or btrfs which can use multiple block devices to back a given path (with or without RAID), we effectively don’t know what block device is providing a given path.

This means that it’s entirely possible, in fact likely, that a container may have multiple disk entries (bind-mounts or straight mounts) which are coming from the same underlying disk.

And that’s where things get weird. To make things work, LXD has logic to guess what block devices back a given path, this does include interrogating the ZFS and btrfs tools and even figures things out recursively when it finds a loop mounted file backing a filesystem.

That logic while not perfect, usually yields a set of block devices that should have a limit applied. LXD then records that and moves on to the next path. When it’s done looking at all the paths, it gets to the very weird part. It averages the limits you’ve set for every affected block devices and then applies those.

That means that “in average” you’ll be getting the right speed in the container, but it also means that you can’t have a “/fast” and a “/slow” directory both coming from the same physical disk and with differing speed limits. LXD will let you set it up but in the end, they’ll both give you the average of the two values.

How does it all work?

Most of the limits described above are applied through the Linux kernel Cgroups API. That’s with the exception of the network limits which are applied through good old “tc”.

LXD at startup time detects what cgroups are enabled in your kernel and will only apply the limits which your kernel support. Should you be missing some cgroups, a warning will also be printed by the daemon which will then get logged by your init system.

On Ubuntu 16.04, everything is enabled by default with the exception of swap memory accounting which requires you pass the “swapaccount=1” kernel boot parameter.

Applying some limits

All the limits described above are applied directly to the container or to one of its profiles. Container-wide limits are applied with:

lxc config set CONTAINER KEY VALUE

or for a profile:

lxc profile set PROFILE KEY VALUE

while device-specific ones are applied with:

lxc config device set CONTAINER DEVICE KEY VALUE

or for a profile:

lxc profile device set PROFILE DEVICE KEY VALUE

The complete list of valid configuration keys, device types and device keys can be found here.

CPU

To just limit a container to any 2 CPUs, do:

lxc config set my-container limits.cpu 2

To pin to specific CPU cores, say the second and fourth:

lxc config set my-container limits.cpu 1,3

More complex pinning ranges like this works too:

lxc config set my-container limits.cpu 0-3,7-11

The limits are applied live, as can be seen in this example:

stgraber@dakara:~$ lxc exec zerotier -- cat /proc/cpuinfo | grep ^proces
processor : 0
processor : 1
processor : 2
processor : 3
stgraber@dakara:~$ lxc config set zerotier limits.cpu 2
stgraber@dakara:~$ lxc exec zerotier -- cat /proc/cpuinfo | grep ^proces
processor : 0
processor : 1

Note that to avoid utterly confusing userspace, lxcfs arranges the /proc/cpuinfo entries so that there are no gaps.

As with just about everything in LXD, those settings can also be applied in profiles:

stgraber@dakara:~$ lxc exec snappy -- cat /proc/cpuinfo | grep ^proces
processor : 0
processor : 1
processor : 2
processor : 3
stgraber@dakara:~$ lxc profile set default limits.cpu 3
stgraber@dakara:~$ lxc exec snappy -- cat /proc/cpuinfo | grep ^proces
processor : 0
processor : 1
processor : 2

To limit the CPU time of a container to 10% of the total, set the CPU allowance:

lxc config set my-container limits.cpu.allowance 10%

Or to give it a fixed slice of CPU time:

lxc config set my-container limits.cpu.allowance 25ms/200ms

And lastly, to reduce the priority of a container to a minimum:

lxc config set my-container limits.cpu.priority 0

Memory

To apply a straightforward memory limit run:

lxc config set my-container limits.memory 256MB

(The supported suffixes are kB, MB, GB, TB, PB and EB)

To turn swap off for the container (defaults to enabled):

lxc config set my-container limits.memory.swap false

To tell the kernel to swap this container’s memory first:

lxc config set my-container limits.memory.swap.priority 0

And finally if you don’t want hard memory limit enforcement:

lxc config set my-container limits.memory.enforce soft

Disk and block I/O

Unlike CPU and memory, disk and I/O limits are applied to the actual device entry, so you either need to edit the original device or mask it with a more specific one.

To set a disk limit (requires btrfs or ZFS):

lxc config device set my-container root size 20GB

For example:

stgraber@dakara:~$ lxc exec zerotier -- df -h /
Filesystem                        Size Used Avail Use% Mounted on
encrypted/lxd/containers/zerotier 179G 542M  178G   1% /
stgraber@dakara:~$ lxc config device set zerotier root size 20GB
stgraber@dakara:~$ lxc exec zerotier -- df -h /
Filesystem                       Size  Used Avail Use% Mounted on
encrypted/lxd/containers/zerotier 20G  542M   20G   3% /

To restrict speed you can do the following:

lxc config device set my-container root limits.read 30MB
lxc config device set my-container root.limits.write 10MB

Or to restrict IOps instead:

lxc config device set my-container root limits.read 20iops
lxc config device set my-container root limits.write 10iops

And lastly, if you’re on a busy system with over-commit, you may want to also do:

lxc config set my-container limits.disk.priority 10

To increase the I/O priority for that container to the maximum.

Network I/O

Network I/O is basically identical to block I/O as far the knobs available.

For example:

stgraber@dakara:~$ lxc exec zerotier -- wget http://speedtest.newark.linode.com/100MB-newark.bin -O /dev/null
--2016-03-26 22:17:34-- http://speedtest.newark.linode.com/100MB-newark.bin
Resolving speedtest.newark.linode.com (speedtest.newark.linode.com)... 50.116.57.237, 2600:3c03::4b
Connecting to speedtest.newark.linode.com (speedtest.newark.linode.com)|50.116.57.237|:80... connected.
HTTP request sent, awaiting response... 200 OK
Length: 104857600 (100M) [application/octet-stream]
Saving to: '/dev/null'

/dev/null 100%[===================>] 100.00M 58.7MB/s in 1.7s 

2016-03-26 22:17:36 (58.7 MB/s) - '/dev/null' saved [104857600/104857600]

stgraber@dakara:~$ lxc profile device set default eth0 limits.ingress 100Mbit
stgraber@dakara:~$ lxc profile device set default eth0 limits.egress 100Mbit
stgraber@dakara:~$ lxc exec zerotier -- wget http://speedtest.newark.linode.com/100MB-newark.bin -O /dev/null
--2016-03-26 22:17:47-- http://speedtest.newark.linode.com/100MB-newark.bin
Resolving speedtest.newark.linode.com (speedtest.newark.linode.com)... 50.116.57.237, 2600:3c03::4b
Connecting to speedtest.newark.linode.com (speedtest.newark.linode.com)|50.116.57.237|:80... connected.
HTTP request sent, awaiting response... 200 OK
Length: 104857600 (100M) [application/octet-stream]
Saving to: '/dev/null'

/dev/null 100%[===================>] 100.00M 11.4MB/s in 8.8s 

2016-03-26 22:17:56 (11.4 MB/s) - '/dev/null' saved [104857600/104857600]

And that’s how you throttle an otherwise nice gigabit connection to a mere 100Mbit/s one!

And as with block I/O, you can set an overall network priority with:

lxc config set my-container limits.network.priority 5

Getting the current resource usage

The LXD API exports quite a bit of information on current container resource usage, you can get:

  • Memory: current, peak, current swap and peak swap
  • Disk: current disk usage
  • Network: bytes and packets received and transferred for every interface

And now if you’re running a very recent LXD (only in git at the time of this writing), you can also get all of those in “lxc info”:

stgraber@dakara:~$ lxc info zerotier
Name: zerotier
Architecture: x86_64
Created: 2016/02/20 20:01 UTC
Status: Running
Type: persistent
Profiles: default
Pid: 29258
Ips:
 eth0: inet 172.17.0.101
 eth0: inet6 2607:f2c0:f00f:2700:216:3eff:feec:65a8
 eth0: inet6 fe80::216:3eff:feec:65a8
 lo: inet 127.0.0.1
 lo: inet6 ::1
 lxcbr0: inet 10.0.3.1
 lxcbr0: inet6 fe80::f0bd:55ff:feee:97a2
 zt0: inet 29.17.181.59
 zt0: inet6 fd80:56c2:e21c:0:199:9379:e711:b3e1
 zt0: inet6 fe80::79:e7ff:fe0d:5123
Resources:
 Processes: 33
 Disk usage:
  root: 808.07MB
 Memory usage:
  Memory (current): 106.79MB
  Memory (peak): 195.51MB
  Swap (current): 124.00kB
  Swap (peak): 124.00kB
 Network usage:
  lxcbr0:
   Bytes received: 0 bytes
   Bytes sent: 570 bytes
   Packets received: 0
   Packets sent: 0
  zt0:
   Bytes received: 1.10MB
   Bytes sent: 806 bytes
   Packets received: 10957
   Packets sent: 10957
  eth0:
   Bytes received: 99.35MB
   Bytes sent: 5.88MB
   Packets received: 64481
   Packets sent: 64481
  lo:
   Bytes received: 9.57kB
   Bytes sent: 9.57kB
   Packets received: 81
   Packets sent: 81
Snapshots:
 zerotier/blah (taken at 2016/03/08 23:55 UTC) (stateless)

Conclusion

The LXD team spent quite a few months iterating over the language we’re using for those limits. It’s meant to be as simple as it can get while remaining very powerful and specific when you want it to.

Live application of those limits and inheritance through profiles makes it a very powerful tool to live manage the load on your servers without impacting the running services.

Extra information

The main LXD website is at: https://linuxcontainers.org/lxd
Development happens on Github at: https://github.com/lxc/lxd
Mailing-list support happens on: https://lists.linuxcontainers.org
IRC support happens in: #lxcontainers on irc.freenode.net

And if you don’t want or can’t install LXD on your own machine, you can always try it online instead!

Posted in Canonical voices, LXD, Planet Ubuntu | Tagged | 48 Comments